A couple of weeks ago I gave you a tour of some of the accessory feet from my sewing box that are useful for garment making. This week I’m opening my accessory box again, this time to look at three feet that will help you get perfectly accurate results when you’re piecing and quilting. Whether you are an experienced quilter or a beginner on a steep learning curve and needing all the help you can get, anything that helps you stich precisely cannot be ignored!
Firstly I’m going to tell you about the Clear Adjustable ¼” Foot with Guide, which helps you to stitch a precise ¼” seam when you’re piecing. Let’s also add into the mix stitching in the ditch (no it’s not sitting in a ditch sewing!) as this is another useful foot with a guide to give you accuracy when quilting. While it’s not specifically a quilting foot, I’m adding the Clear Open Toe Foot as it’s one I find most useful in lots of projects, including quilting. So let’s take a closer look at these three very useful feet.
A note on Stitch Width Safety

Before we begin, it’s important to note that the Clear Adjustable ¼” Foot with Guide and the Clear Stitch in the Ditch Foot are both designed to be used for straight stitching only. Many of the current range of Husqvarna Viking machines have an option in the tools menu called ‘Stitch Width Safety’ and I would recommend you select this when using straight stitching feet or a straight stitching needle plate. This means that the stitch width will be limited to zero for all stitches to prevent damage to the needle, presser foot and needle plate. This setting is saved when the machine is turned off. A pop-up message reminds you of the setting when you turn on the machine, so if you want to do a zig zag stitch you must remember to unselect it otherwise you’ll be straight stitching forever!

If you don’t have the Stitch Width Safety option on your machine then you will need to remember to change the foot before going on to select zig zag or decorative stitches, otherwise you could end up breaking a needle or damaging your foot.
The Clear Adjustable ¼” Foot with Guide
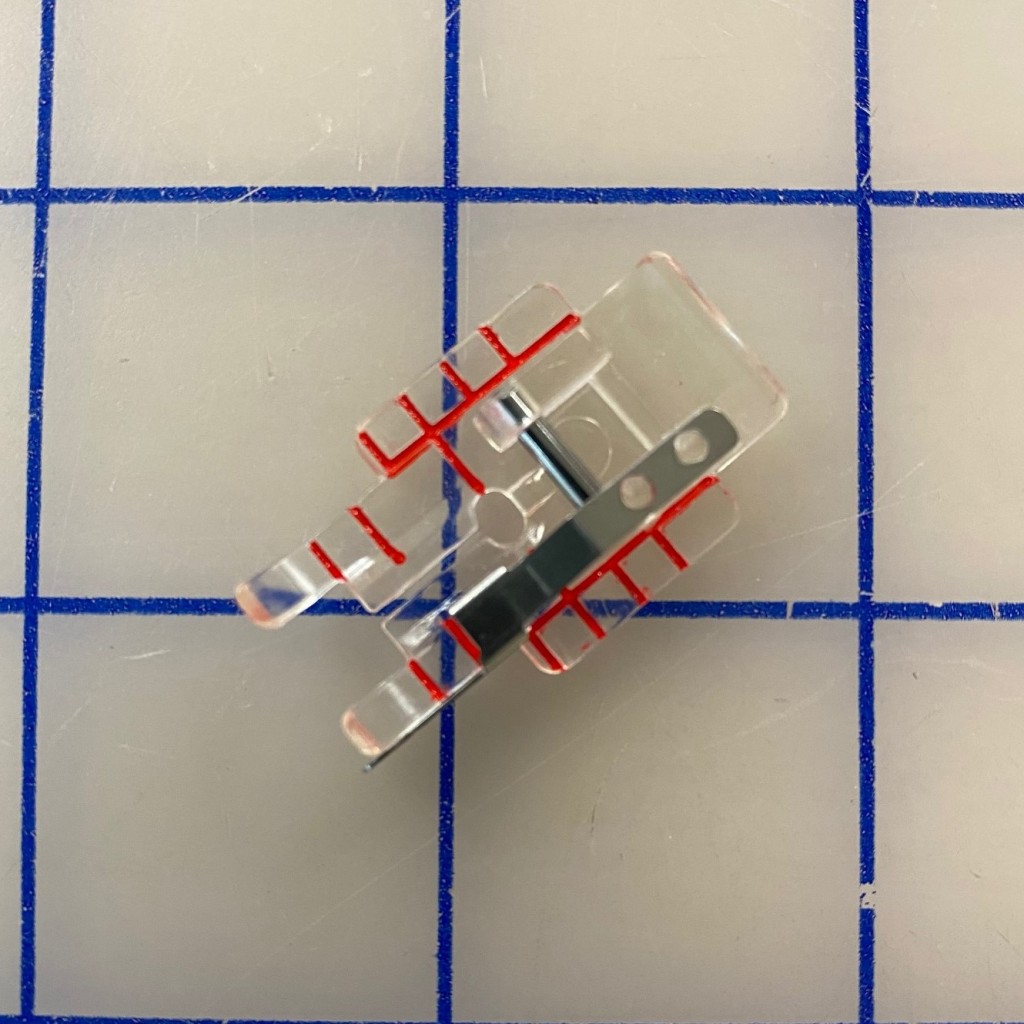
Piecing together a quilt is as much an art as a science, but the real key to accurate piecing is a precise ¼” seam. The Clear Adjustable ¼” Foot with Guide allows you to do just that. Simply position the metal guide on the foot on the edge of your fabric and follow it as you stitch – if your pieces are cut accurately then that’s all it takes to achieve accurate seams! The red horizontal markings on the foot make it easy to turn on the corners when piecing or topstitching.
What about if you want to stitch a scant ¼” seam allowance? If you’re not sure what it is, a scant ¼” seam allowance is slightly narrower than a standard ¼” seam allowance – this takes into account the fabric thickness so that when you open out your seams your blocks will be the exact width you are expecting. With just one seam then this difference is negligible, but when you have pieced together dozens of blocks then it adds up and can lead to your quilt being measurably smaller than you are expecting!
The Clear Adjustable ¼” Foot with Guide has an oval hole that allows you to adjust your needle position (your sewing machine instruction book will tell you how). This lets you move the needle slightly from left to right, allowing you to stitch with that perfectly precise scant ¼” seam allowance while using the guide along the edge of your fabric to stitch with ease!


The second picture shows the guide placed at the edge of the fabric, ready to sew.
Clear Stitch in the Ditch Foot
Stitching in the ditch means to stitch in in the finished seam of a quilt… or garment because this foot isn’t just for quilters! Line up the metal guide in the centre of the Clear Stitch in the Ditch Foot with the seam and you will be able to stitch effortlessly down the seam, plus you have great visibility because the foot is clear. There are markings on the foot to make turning on a corner easy – you can choose either 1/4” (6mm) or 1/8” (3mm).
Stitching in the ditch on a quilt will help to stabilise the fabric and prevent it from moving. In garment making it’s great for top stitching, but remember you can only straight stitch. If you are wanting to decorative stitch take a look at the Clear B Edge Joining Foot This is a similar foot with the guide in the middle, but has an opening to allow you to swing the needle.


The second picture shows the guide placed in the seam ‘ditch’, ready to sew.
Clear Open Toe Foot
Lastly, let’s look at the Clear Open Toe Foot. This foot has been available for many years so if you already have one then it’s worth digging it out of your accessory tray! As it’s a clear foot then it will give you great visibility for appliqué projects where you need to see the edge of the fabric or for decorative stitching. If you turn the foot over and look at the back of it you will see it has a tunnel that allows the foot to feed smoothly over the stitches, particularly the denser type stitches. The B foot (decorative stitch foot) that comes with all Husqvarna Viking machines also has the tunnel underneath but I often swap to the Clear Open Toe foot for better visibility.


The second picture shows the underside of the foot with a tunnel to allow your stitching to easily pass under the foot.
The third picture shows the great visibility that you get with this foot.
We have a special offer on these feet at the moment – you can buy them as a bundle and save 10%! This offer is only available online so make sure you get it while you can!
For Epic 2 Owners
If you own an Epic 2 then don’t worry, there are versions of all of these feet that are compatible with the Integrated Dual Feed (IDF) on the Epic 2, just click to see them on our website:
These are just three of the many feet available from Husqvarna Viking so look out for information about more feet in our future blog posts. We’ll also be running a foot class in the New Year, where you’ll have an opportunity to find out what’s available and have a go!
Happy stitching!

